
Update on Feb 03 2017:
I asked the question on the RIOT-OS issue tracker (https://github.com/RIOT-OS/RIOT/issues/6535)
Apparently, the problem with Uno and Mega2560 is due to the fact that I used the VM provided (https://github.com/RIOT-OS/RIOT/tree/master/dist/tools/vagrant ). When I retried without the VM, the problem related to UNO/Mega2560 disappeared.
An explanation given by kYcOo is:
I think the problem lies on the fact that you’re using the vagrant VM. It comes with predefined default access to several boards which provide UART connectivity, and usually it works good so far. At the same time, if the resources of the host are not so high, of course it has a consequence on the communication with external hardware.
Recently, I am playing with Arduino boards, and would like to run a real OS on it, rather than a simple “loop” sketch. So I’m thinking about RIOT OS. According to the wiki of RIOT OS (https://github.com/RIOT-OS/RIOT/wiki Jan 1 2017), five kinds of boards are supported by RIOT OS:
- Arduino Due (ARM family)
- Arduino Zero (ARM family)
- Arduino Mega2560 (ATmega family)
- Arduino Uno (ATmega family)
- Arduino Duemilanove (ATmega family)
I tested three of them: Due, Mega2560 and Uno.
Arduino Due
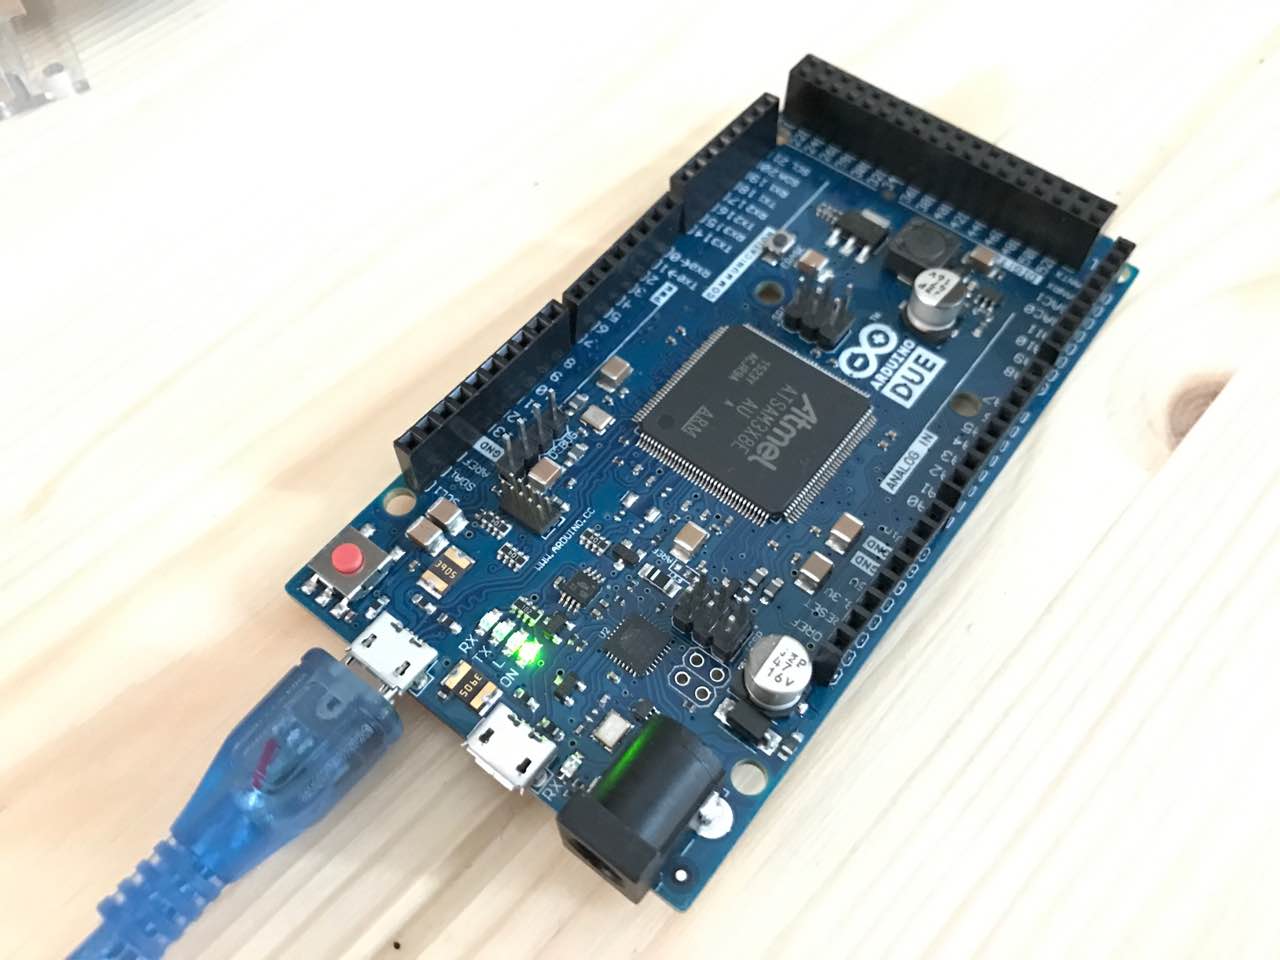
I tried to flash the RioT OS to the board. To do so, I followed the instructions from the link https://github.com/RIOT-OS/RIOT/wiki/Board:-Arduino-Due, which seems to be very straightforward:
Flashing RIOT on the Arduino Due is quite straight forward, just connect your Arduino Due using the programming port to your host computer and type:
make flash
This should take care of everything!
RIOTs Makefile carries out a two step process for flashing the Arduino Due:
the (serial) programming port is programmed to run at 1200bps. This will trigger the on-board ATMega to reset the SAM3X and boot it to the internal serial flash bootloader
we use the open bossac tool to write the new code into the SAM3X’s flash
However, I got error messages like:
/home/vagrant/RIOT/boards/arduino-due/dist/flash.sh
Device found on ttyACM0
Erase flash
Write 9004 bytes to flash
[================ ] 55% (20/36 pages)
SAM-BA operation failed
/home/vagrant/RIOT/Makefile.include:330: recipe for target 'flash' failed
On the other hand, when using the native port, I actually got the correct message:
/home/vagrant/RIOT/boards/arduino-due/dist/flash.sh
Device found on ttyACM0
Erase flash
Write 9004 bytes to flash
[==============================] 100% (36/36 pages)
Verify 9004 bytes of flash
[==============================] 100% (36/36 pages)
Verify successful
Set boot flash true
CPU reset.
However, after the flashing, my laptop (a Mac Book pro) couldn’t find the Arduino in its device list, which makes it hard to tell whether the device is running properly or not.
To show the serial port information, I tried the programming port again, with screen:
screen ttyACM0
which gives me messy code like (probably due to wrong setting of baud rate)
�wФʣ����9�La@�8�D;>8̦�gu6�
�V:�9�E�r�v?̨
�>{#e�ۣ
�V:�9�E�rv?̨
�>{#e�ۣ
�V:�8�E�rv?̨
�>nA#e�ۣ
�V:�8�E�rv?̨+�>nC#%��
�V:�8�E�rv?̨+�>nC#%��
However, if we use the pyterm program provided by Riot OS (by launching make term),
$ BOARD=arduino-due make term
/home/vagrant/RIOT/dist/tools/pyterm/pyterm -p "/dev/ttyACM0" -b "115200"
No handlers could be found for logger "root"
2016-12-16 15:03:46,567 - INFO # Connect to serial port /dev/ttyACM0
Welcome to pyterm!
Type '/exit' to exit.
...
2016-12-16 15:03:47,600 - INFO # This application runs on arduino-due, 17
2016-12-16 15:03:47,601 - INFO # This application runs on arduino-due, 18
2016-12-16 15:03:47,601 - INFO # This application runs on arduino-due, 19
2016-12-16 15:03:47,602 - INFO # This application runs on arduino-due, 20
2016-12-16 15:03:47,602 - INFO # This application runs on arduino-due, 21
2016-12-16 15:03:47,603 - INFO # This application runs on arduino-due, 22
Apparently, this is due to the output code of the Riot OS. Now we can see the device is running as expected with Riot OS.
You might ask: if I couldn’t see my Arduino in the native port after flashing Riot OS, how to flash it again? A stupid, but workable solution is: try to do a flash on the programming port, which will surely give you the same error message shown above — but after this, you will be able to see the device by connecting native port.
Here is an explanation of native port and programming port from https://www.arduino.cc/en/Main/ArduinoBoardDue :
- Native port: directly connected to USB host pins of SAM3X. Able to use DUE as a client USB peripheral or host device. Also can be used as virtual serial port using “SerialUSB” object in the Arduino programming language.
- Programming port: connected to an ATmega16U2, which provides a virtual COM port to software on a connected computer. The 16U2 is also connected to the SAM3X hardware UART. Serial on pins RX0 and TX0 provides Serial-to-USB communication for programming the board through the ATmega16U2 microcontroller.
If you know why exactly there is such strange behaviour with RioT OS (with the normal Arduino IDE, both ports work well with sketchs), please let me know 🙂
Arduino UNO
Very recently, Riot OS has its support to Arduino UNO (https://github.com/RIOT-OS/RIOT/wiki/Board:-Arduino-Uno).
However, I need very good luck to flash the Riot OS to the UNO board, because most of the time, I got error messages like (it might stop at any point):
avrdude -p atmega328p -c arduino -P /dev/ttyACM0 -b 115200 -F -D -U flash:w:bin/arduino-uno/Task01.hex
avrdude: AVR device initialized and ready to accept instructions
Reading | ################################################## | 100% 0.01s
avrdude: Device signature = 0x1e950f (probably m328p)
avrdude: reading input file "bin/arduino-uno/Task01.hex"
avrdude: input file bin/arduino-uno/Task01.hex auto detected as Intel Hex
avrdude: writing flash (5676 bytes):
Writing | ############################### | 62% 0.69s
avrdude: stk500_paged_write(): (a) protocol error, expect=0x14, resp=0x00
Writing | ################################ | 64% 1.84savrdude: stk500_cmd(): programmer is out of sync
avrdude: stk500_cmd(): programmer is out of sync
avrdude: stk500_cmd(): programmer is out of sync
avrdude: stk500_cmd(): programmer is out of sync
If I was in luck (after 20~ retries), I will be able to see:
avrdude -p atmega328p -c arduino -P /dev/ttyACM0 -b 115200 -F -D -U flash:w:bin/arduino-uno/Task01.hex
avrdude: AVR device initialized and ready to accept instructions
Reading | ################################################## | 100% 0.01s
avrdude: Device signature = 0x1e950f (probably m328p)
avrdude: reading input file "bin/arduino-uno/Task01.hex"
avrdude: input file bin/arduino-uno/Task01.hex auto detected as Intel Hex
avrdude: writing flash (5676 bytes):
Writing | ################################################## | 100% 1.11s
avrdude: 5676 bytes of flash written
avrdude: verifying flash memory against bin/arduino-uno/Task01.hex:
avrdude: load data flash data from input file bin/arduino-uno/Task01.hex:
avrdude: input file bin/arduino-uno/Task01.hex auto detected as Intel Hex
avrdude: input file bin/arduino-uno/Task01.hex contains 5676 bytes
avrdude: reading on-chip flash data:
Reading | ################################################## | 100% 0.92s
avrdude: verifying ...
avrdude: 5676 bytes of flash verified
avrdude: safemode: Fuses OK (E:00, H:00, L:00)
avrdude done. Thank you.
Apparently, something is wrong with the avrdude, which is for flashing the UNO board. However, without knowing much about avrdude , I have no idea what’s going wrong.
Arduino Mega2560
With Mega2560, the flashing doesn’t work either:
/home/vagrant/Tutorials/task-01/bin/arduino-mega2560/Task01.elf
avrdude -p m2560 -c stk500v2 -P /dev/ttyACM0 -b 115200 -F -D -U flash:w:bin/arduino-mega2560/Task01.hex
avrdude: AVR device initialized and ready to accept instructions
Reading | ################################################## | 100% 0.01s
avrdude: Device signature = 0x1e9801 (probably m2560)
avrdude: reading input file "bin/arduino-mega2560/Task01.hex"
avrdude: input file bin/arduino-mega2560/Task01.hex auto detected as Intel Hex
avrdude: writing flash (6230 bytes):
Writing | ###################### | 44% 0.48savrdude: stk500v2_ReceiveMessage(): timeout
avrdude: stk500v2_ReceiveMessage(): timeout
^C/home/vagrant/RIOT/Makefile.include:330: recipe for target 'flash' failed
make: *** [flash] Interrupt
Disclaimer: I started RIOT and I’m still a core developer.
I’m sorry you had some trouble using RIOT on Arduino.
I’ll try to help.
It seems you’re having different issues:
1. Arduino Due
You definitely have to use the “programming port”. It is the one closest to the round power connector.
When using screen as you did, screen uses the wrong baudrate. Try “screen /<path-to/ttyACM0 115200" to tell it to use 115200 as baudrate.
With RIOT, you interact with the Due using the "programming" port, as it passes the SAM3X's first UART, using an 16U2 as serial-to-USB converter, via USB to the host.
The "native" port is (AFAIK) currently unnused by RIOT, that's why you do not see it in your OS's device list anymore when connecting that port.
2. Arduino Uno, Mega2560
Are you flashing from within a VM? That sometimes (depending on all the hardware and drivers in the loop) messes up the timings.
You could try to make avrdude try a little slower. For that, you need to find the line
setting PROGRAMMER_FLAGS in "boards/arduino-mega2560/Makefile.include" (it is line 33 in my checkout). Try to add a delay ("-i 1000") to that line.
Hope I could help!
Thanks very much Kaspar!
Regarding the issues with UNO, I opened a ticket at GitHub https://github.com/RIOT-OS/RIOT/issues/6535
As suggested, I tried flashing the Riot OS without using the VM. Now it works well — thanks very much!
I have uploaded my sketch on Arduino Due. Worked great. Then stopped. I found with the Mega the program ran continuously, where it does not on the Due. When I press the rest button on the board it runs through once.
How do I get it to keep looping?
#define _USE_MATH_DEFINES // to force M_PI to exist
#include //for pow, sin and M_PI
#define ASIZE 10 //for A
#define TSIZE 4000 //or 4000
int Fs = 2000;
int L = TSIZE;
double A[ASIZE] = {16, 18, 28, 33, 38, 41, 59, 43, 40, 58};
double forigin[ASIZE] = {25.0, 31.5, 40.0, 50.0, 63.0, 80.0, 100.0, 125.0, 160.0, 200.0};
double S[TSIZE];
double t[TSIZE];
double XformerPin = 7;
double T = 1/(double)Fs;
int i,k,j;
int var = 0;
// ln -sf /dev/ttymxc3 /dev/ttyS0
//double apow = pow(10, A[k]/20);
void setup() {
Serial.begin(115200);
}
void loop()
{
while(var < 200){
for ( i = 0; i < TSIZE ; i++ ) /* initialize elements of array t to 0 */
{
t[i] = (float) i*T; /* set element at location i to i*T */
}
for (j = 0; j < TSIZE; j++ ) /* output each array element's value */
{
// Serial.print(t[j],15);
// Serial.println("");
// delay(500);
}
//initialise S to 0
for (i = 0; i < TSIZE; ++i) S[i] = 0;
//implement the for k=1:length(A)
for (k = 1; k < ASIZE – 1; ++k){
//devectorise the S calculation
for (i = 0; i < TSIZE; ++i){
S[i] = S[i] + pow(10, A[k]/20) * sin(2*M_PI*forigin[k]*t[i]);
analogWrite(XformerPin, S[i]);
Serial.println(S[i]);
// delay(20);
// Serial.print(S[i]);
// Serial.println("");
// delay(500);
//}
//}
//apow; //declaration may need to be at the beggining of the function
//for (k = 0; i < 10; ++i){
//
// for (i = 0; i < TSIZE; ++i){
// S[i] = S[i] + apow * sin(2*M_PI*forigin[k]*t[i]);
// Serial.print(S[i],4);
// Serial.println("");
// delay(500);
}
}
}
}