Finally: MP-OLSR becomes RFC8218

After ten years of hard work (well… not that hard), 20 revisions, MP-OLSR, the Multipath Extension for the Optimized Link State Routing Protocol Version 2 (OLSRv2)  finally gets its RFC number: 8218 (https://tools.ietf.org/html/rfc8218).

MP-OLSR is my major work of my PhD thesis. It is a multipath routing protocol based on OLSR. The Multipath Dijkstra Algorithm is proposed to obtain multiple paths. The algorithm gains great flexibility and extensibility by employing different link metrics and cost functions. In addition, route recovery and loop detection are implemented in MP-OLSR in order to improve quality of service regarding OLSR. The backward compatibility with OLSR based on IP source routing is also supported.

More details, publications and implementations related to MP-OLSR can be found at  https://jiaziyi.com/research-projects/mp-olsr/

Posted in Uncategorized | Leave a comment

Yes, our IoT lab

Recently, our Network Research Team@X has been acquiring widgets for building our small, but neat IoT lab, to:

  • teach the students
  • build test beds and experiments
  • build IoT prototype
  • and mostly, have fun

With different kinds of main boards, radios, sensors, etc., we can actually build very interesting IoT applications. Now let’s see what do we have now:

Boards: RPi, Arduino UNO, Due, Freescale…

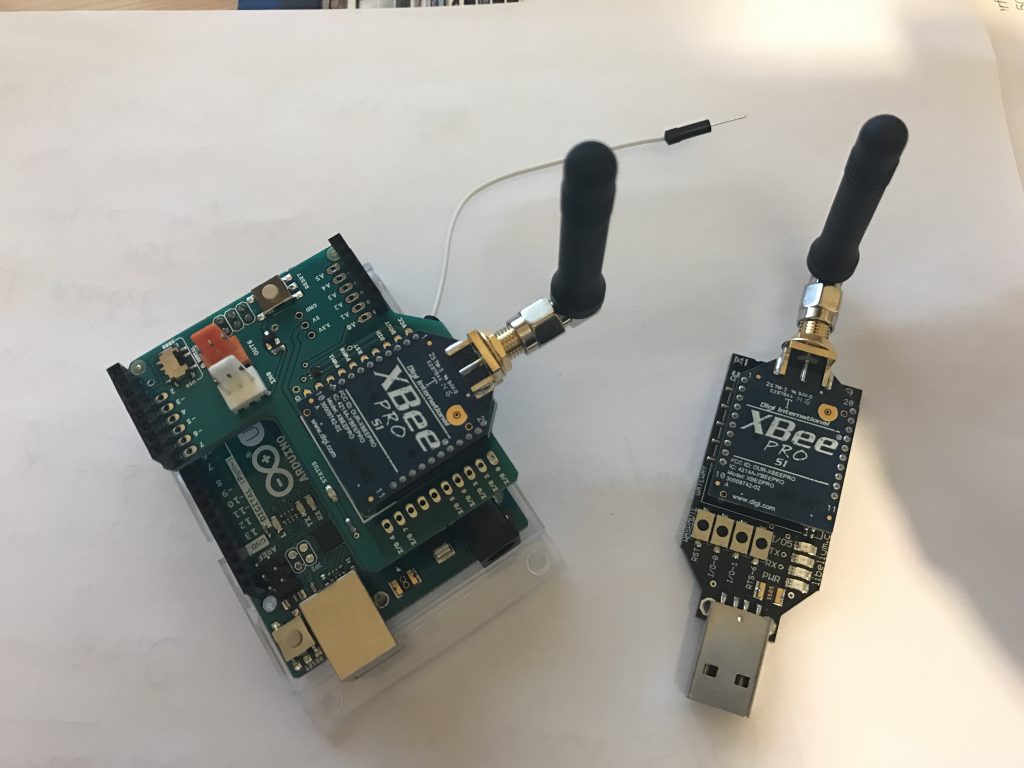
Radio shields: LoRa, Bluetooth, 802.15.4, Zigbee, Wifi, etc…

Wireless OPENWRT flashed routers

Pads for test…

More than 40 different kinds of sensors

Resistors, transistors, capacitors, etc…

Tools

Posted in 技术 Tech | Leave a comment

Polytechinique’s Executive Education on IoT is on the way!

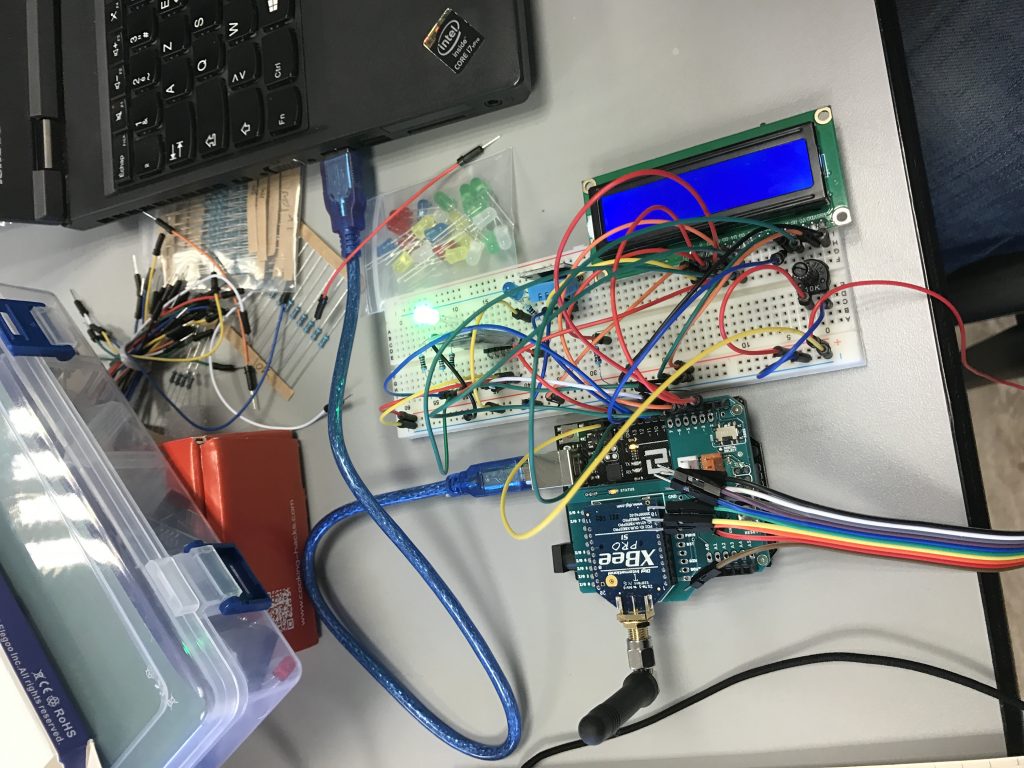
Recently, I participated in Polytecnique’s Executive Education program, giving classes for the hands-on session, which means, wiring the boards, connecting different kinds of sensors, writing programs to drive the hardware, and eventually building connected objects for the “smart” world!

X’s IoT executive education program (more information) aims at providing the best IoT education to experienced engineers, project manages, consultants, etc. who are interested in exploring the future “connected smart world”. Different from the “fresh” students that I usually work with at X, the participants of the executive IoT program are much more experienced with different backgrounds: network engineers, project managers, consultants, founder of startups, etc. Therefore, for me, giving the class means not only sharing my knowledge with them, but also getting to know what are their expectations (especially from industry) for IoT, and what are the real problems that they face. No need to say, it was great experience.

Before the hands-on session, the participants had already classes on network protocols related to IoT (from basic TCP/IP to LoRa, 802.15.4, CoAP, etc.) and protocol verification.

The purpose of the hands-on session is to build smart things that can speak, feel, listen, see, communicate and think. We begin with “sensing the physical world” based on Arduino boards, which includes temperature, humidity, distance, light intensity, sound, etc. with wide arrange of sensors provided by our networking lab at X.

After getting familiar with the *local* input/output, we continued with the communication part: have the things connected. Knowing the heterogeneous nature of layer 2 technologies, we played with different kinds of radios: Bluetooth, 802.15.4, LoRa, Sigfox, WiFi, etc.

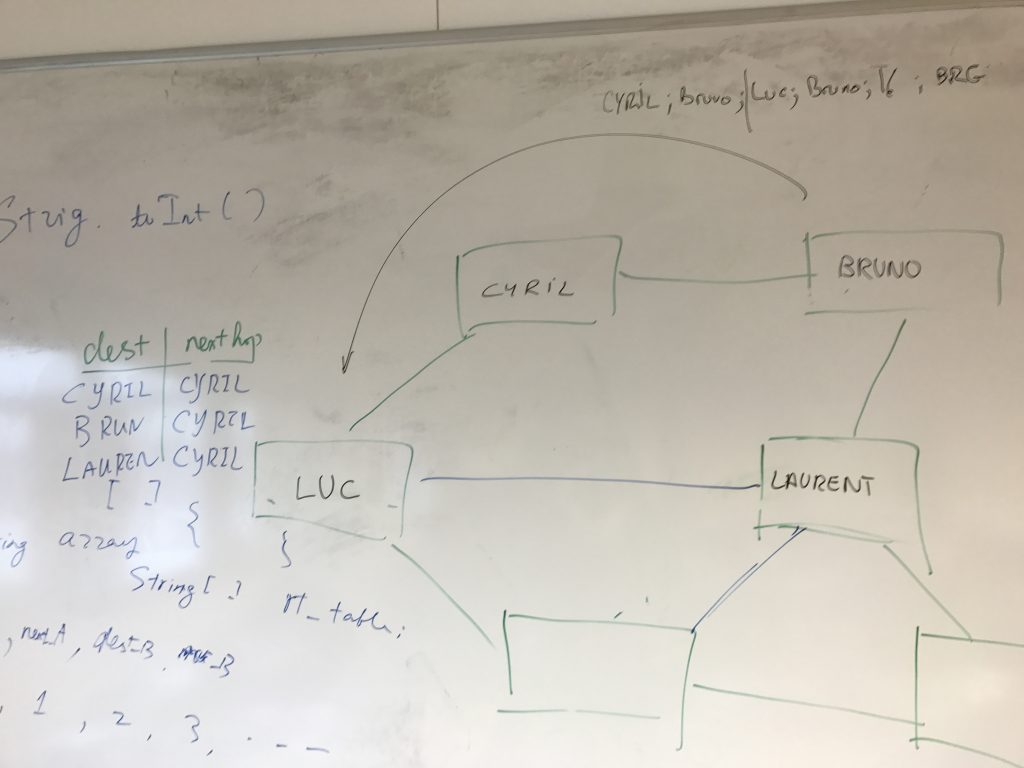
Of course, sending the message across one-hop is too boring, so we actually built a multi-hop network with static routing: (yes, I know, it would be even more interesting to implement a dynamic routing protocol — but we have only 2 hours in the class)


With the basics on manipulating sensors and radios, we continued with the “brain” for IoT: the operating system. It’s true that Arduino provided a fairly handy interface to the hardware, but there are still some limitations, especially on the support of multi-threading and network protocol stack. So we studied the RioT OS, one of the most recent and popular operating systems designed for IoT, and FreeRTOS which can be easily integrated with Arduino sketchs.

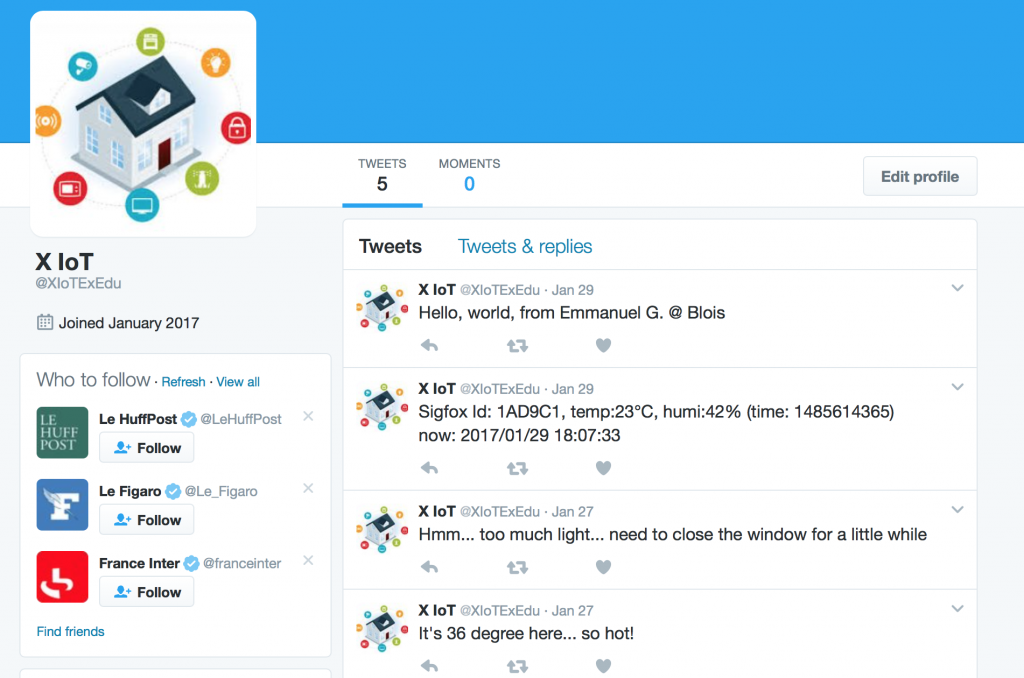
The final day was the “I” of IoT: connecting to the Internet. Our participants are free to build their own small projects, including a sensing part, a communication part and a “uplink” to the Internet. For example, sending a mail notification (and possibly taking a picture) when someone gets into a room, twittering messages regularly about the information of the environment (temperature, humidity, pollution, etc.), using the OS for IoT to process real time data, etc.

It was a great pleasure to work with our participants in such excellent occasion and learn IoT technology by actually building smart things. Thanks very much to all the students and my colleagues who worked hard in the program to make it a great journey!

Posted in 新闻 Events | Tagged , , | Leave a comment

Flashing Riot OS for Arduino Boards

Update on Feb 03 2017:

I asked the question on the RIOT-OS issue tracker (https://github.com/RIOT-OS/RIOT/issues/6535)

Apparently, the problem with Uno and Mega2560 is due to the fact that I used the VM provided (https://github.com/RIOT-OS/RIOT/tree/master/dist/tools/vagrant ). When I retried without the VM, the problem related to UNO/Mega2560 disappeared. 

An explanation given by kYcOo is:

I think the problem lies on the fact that you’re using the vagrant VM. It comes with predefined default access to several boards which provide UART connectivity, and usually it works good so far. At the same time, if the resources of the host are not so high, of course it has a consequence on the communication with external hardware.

Recently, I am playing with Arduino boards, and would like to run a real OS on it, rather than a simple “loop” sketch. So I’m thinking about RIOT OS. According to the wiki of RIOT OS (https://github.com/RIOT-OS/RIOT/wiki Jan 1 2017), five kinds of boards are supported by RIOT OS:

  • Arduino Due (ARM family)
  • Arduino Zero (ARM family)
  • Arduino Mega2560 (ATmega family)
  • Arduino Uno (ATmega family)
  • Arduino Duemilanove (ATmega family)

I tested three of them: Due, Mega2560 and Uno.

Arduino Due
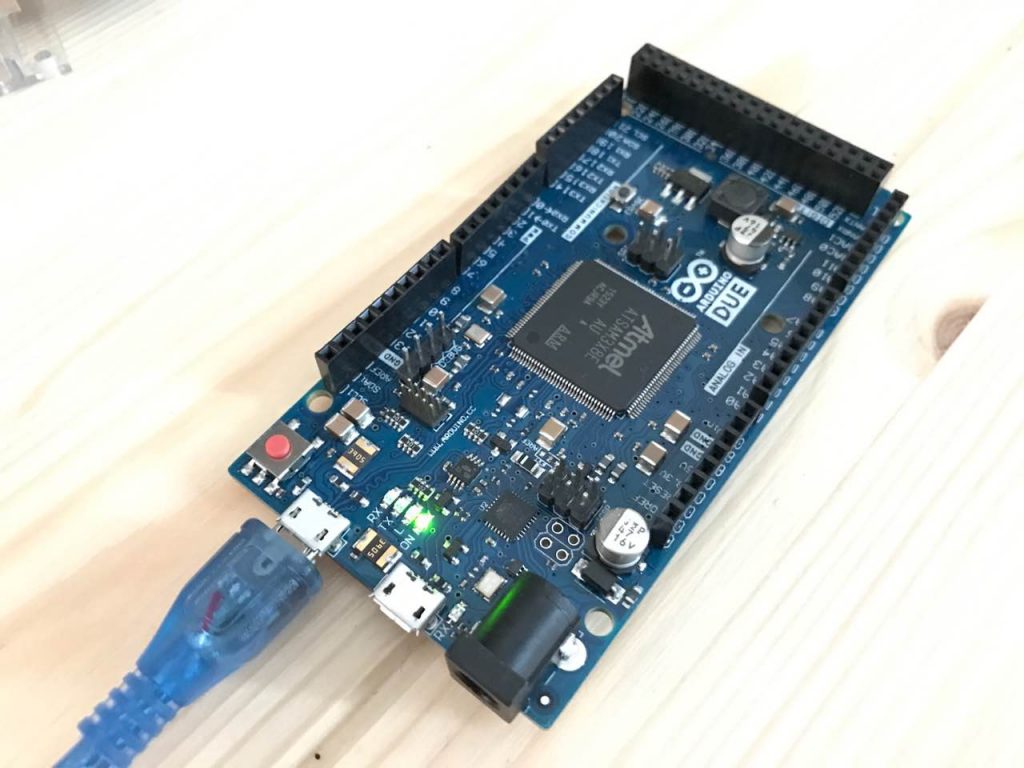
wechatimg1

I tried to flash the RioT OS to the board. To do so, I followed the instructions  from the link https://github.com/RIOT-OS/RIOT/wiki/Board:-Arduino-Due, which seems to be very straightforward:

Flashing RIOT on the Arduino Due is quite straight forward, just connect your Arduino Due using the programming port to your host computer and type:

make flash

This should take care of everything!

RIOTs Makefile carries out a two step process for flashing the Arduino Due:

the (serial) programming port is programmed to run at 1200bps. This will trigger the on-board ATMega to reset the SAM3X and boot it to the internal serial flash bootloader

we use the open bossac tool to write the new code into the SAM3X’s flash

However, I got error messages like:

/home/vagrant/RIOT/boards/arduino-due/dist/flash.sh
Device found on ttyACM0
Erase flash
Write 9004 bytes to flash
[================ ] 55% (20/36 pages)
SAM-BA operation failed
/home/vagrant/RIOT/Makefile.include:330: recipe for target 'flash' failed

On the other hand, when using the native port, I actually got the correct message:

/home/vagrant/RIOT/boards/arduino-due/dist/flash.sh
Device found on ttyACM0
Erase flash
Write 9004 bytes to flash
[==============================] 100% (36/36 pages)
Verify 9004 bytes of flash
[==============================] 100% (36/36 pages)
Verify successful
Set boot flash true
CPU reset. 

However, after the flashing, my laptop (a Mac Book pro) couldn’t find the Arduino in its device list, which makes it hard to tell whether the device is running properly or not.

To show the serial port information, I tried the programming port again, with screen:

screen ttyACM0

which gives me messy code like (probably due to wrong setting of baud rate)

�wФʣ�׷���9�La@�8�D;>8̦�gu6�
�V:�9�E�r�v?̨
�>{#e�ۣ
�V:�9�E�rv?̨
�>{#e�ۣ
�V:�8�E�rv?̨
�>nA#e�ۣ
�V:�8�E�rv?̨+�>nC#%��

However, if we use the pyterm program provided by Riot OS (by launching make term),

$ BOARD=arduino-due make term
/home/vagrant/RIOT/dist/tools/pyterm/pyterm -p "/dev/ttyACM0" -b "115200"
No handlers could be found for logger "root"
2016-12-16 15:03:46,567 - INFO # Connect to serial port /dev/ttyACM0
Welcome to pyterm!
Type '/exit' to exit.

...

2016-12-16 15:03:47,600 - INFO # This application runs on arduino-due, 17
2016-12-16 15:03:47,601 - INFO # This application runs on arduino-due, 18
2016-12-16 15:03:47,601 - INFO # This application runs on arduino-due, 19
2016-12-16 15:03:47,602 - INFO # This application runs on arduino-due, 20
2016-12-16 15:03:47,602 - INFO # This application runs on arduino-due, 21
2016-12-16 15:03:47,603 - INFO # This application runs on arduino-due, 22

Apparently, this is due to the output code of the Riot OS. Now we can see the device is running as expected with Riot OS.

You might ask: if I couldn’t see my Arduino in the native port after flashing Riot OS, how to flash it again? A stupid, but workable solution is: try to do a flash on the programming port, which will surely give you the same error message shown above — but after this, you will be able to see the device by connecting native port.

Here is an explanation of native port and programming port from https://www.arduino.cc/en/Main/ArduinoBoardDue  :

  • Native port: directly connected to USB host pins of SAM3X. Able to use DUE as a client USB peripheral or host device. Also can be used as virtual serial port using “SerialUSB” object in the Arduino programming language.
  • Programming port: connected to an ATmega16U2, which provides a virtual COM port to software on a connected computer.  The 16U2 is also connected to the SAM3X hardware UART. Serial on pins RX0 and TX0 provides Serial-to-USB communication for programming the board through the ATmega16U2 microcontroller.

If you know why exactly there is such strange behaviour with RioT OS (with the normal Arduino IDE, both ports work well with sketchs), please let me know 🙂

Arduino UNO

Very recently, Riot OS has its support to Arduino UNO (https://github.com/RIOT-OS/RIOT/wiki/Board:-Arduino-Uno).

However, I need very good luck to flash the Riot OS to the UNO board, because most of the time, I got error messages like (it might stop at any point):

avrdude -p atmega328p -c arduino -P /dev/ttyACM0 -b 115200 -F -D -U flash:w:bin/arduino-uno/Task01.hex

avrdude: AVR device initialized and ready to accept instructions

Reading | ################################################## | 100% 0.01s

avrdude: Device signature = 0x1e950f (probably m328p)
avrdude: reading input file "bin/arduino-uno/Task01.hex"
avrdude: input file bin/arduino-uno/Task01.hex auto detected as Intel Hex
avrdude: writing flash (5676 bytes):

Writing | ############################### | 62% 0.69s
avrdude: stk500_paged_write(): (a) protocol error, expect=0x14, resp=0x00
Writing | ################################ | 64% 1.84savrdude: stk500_cmd(): programmer is out of sync
avrdude: stk500_cmd(): programmer is out of sync

If I was in luck (after 20~ retries), I will be able to see:

avrdude -p atmega328p -c arduino -P /dev/ttyACM0 -b 115200 -F -D -U flash:w:bin/arduino-uno/Task01.hex

avrdude: AVR device initialized and ready to accept instructions

Reading | ################################################## | 100% 0.01s

avrdude: Device signature = 0x1e950f (probably m328p)
avrdude: reading input file "bin/arduino-uno/Task01.hex"
avrdude: input file bin/arduino-uno/Task01.hex auto detected as Intel Hex
avrdude: writing flash (5676 bytes):

Writing | ################################################## | 100% 1.11s

avrdude: 5676 bytes of flash written
avrdude: verifying flash memory against bin/arduino-uno/Task01.hex:
avrdude: load data flash data from input file bin/arduino-uno/Task01.hex:
avrdude: input file bin/arduino-uno/Task01.hex auto detected as Intel Hex
avrdude: input file bin/arduino-uno/Task01.hex contains 5676 bytes
avrdude: reading on-chip flash data:

Reading | ################################################## | 100% 0.92s

avrdude: verifying ...
avrdude: 5676 bytes of flash verified

avrdude: safemode: Fuses OK (E:00, H:00, L:00)

avrdude done. Thank you.

Apparently, something is wrong with the avrdude, which is for flashing the UNO board. However, without knowing much about avrdude , I have no idea what’s going wrong.

Arduino Mega2560

With Mega2560, the flashing doesn’t work either:

/home/vagrant/Tutorials/task-01/bin/arduino-mega2560/Task01.elf
avrdude -p m2560 -c stk500v2 -P /dev/ttyACM0 -b 115200 -F -D -U flash:w:bin/arduino-mega2560/Task01.hex

avrdude: AVR device initialized and ready to accept instructions

Reading | ################################################## | 100% 0.01s

avrdude: Device signature = 0x1e9801 (probably m2560)
avrdude: reading input file "bin/arduino-mega2560/Task01.hex"
avrdude: input file bin/arduino-mega2560/Task01.hex auto detected as Intel Hex
avrdude: writing flash (6230 bytes):

Writing | ###################### | 44% 0.48savrdude: stk500v2_ReceiveMessage(): timeout
avrdude: stk500v2_ReceiveMessage(): timeout
^C/home/vagrant/RIOT/Makefile.include:330: recipe for target 'flash' failed
make: *** [flash] Interrupt

Posted in 技术 Tech | Tagged , | 3 Comments

Getting the same address of the local variable in GDB? Think about the address randomization

When playing with GDB this afternoon, I noticed a “strange” behavior.

Even with simple code like

#include <stdio.h>

int main(void)
{
int x = 1;
printf(“x=%d\t address: %p\n”, x, &x);
return 0;
}

In GDB, we always get the same address, even run with different processes:

x=1 address: ffffdd0c

x=1 address: ffffdd0c

The normal behavior should be like below, if run directly in Linux:

./addressTest
x=1 address: 0x7ffff202754c

./addressTest
x=1 address: 0x7ffff202712c

This is due to the fact that in GDB, the disable-randomization is turned on by default. It should be turned off if we expect regular output:

set disable-randomization off

More details here: http://visualgdb.com/gdbreference/commands/set_disable-randomization

https://sourceware.org/gdb/onlinedocs/gdb/Starting.html

From WiKi: Linux kernel enabled a weak form of ASLR by default since the kernel version 2.6.12, released in June 2005.[12] The PaX and Exec Shieldpatchsets to the Linux kernel provide more complete implementations.

Posted in 技术 Tech | Leave a comment

Mount time capsule to Linux/Raspberrypi

sudo mount.cifs //IP_ADDRESS/DIR MOUNT_POINT -o “user=YOUR_USERNAME,passwd=YOUR_PWD,sec=ntlm”

echo “//IP_ADDRESS/MOUNT_POINTMOUNT_POINT cifs user=MOUNT_POINT,pass=YOUR_PWD,rw,uid=1000,iocharset=utf8 0 0” >> /etc/fstab


Posted in 技术 Tech | Leave a comment

Gnuplot with png and pdf terminal

One might get messages like

unknown or ambiguous terminal type; type just ‘set terminal’ for a list

To use png as terminal in GNUPlot, libgd2-dev library is needed (which is not provided in some distributions).

After installing libgd2-dev, one needs to rebuild gnuplot.

Also from: http://xmodulo.com/how-to-export-gnuplot-output-to-png-jpg-and-pdf.html

If you would like to save Gnuplot output as any other formats than those supported by native Gnuplot terminals, you can use redirect operator ¨|¨, to redirect Gnuplot’s native output to an external tool for format conversion.

For example, to export Gnuplot output to pdf format, first install ps2pdf which is contained in ghostscript package. Then redirect Gnuplot’s poscript output to pdf format.

$ sudo apt-get install ghostscript
set terminal postscript
set output '| ps2pdf - output.pdf'


Posted in 技术 Tech | Leave a comment

Making use of external libraries in NS3

There are have been some articles introducing how to make used of external libraries in NS3, such as

HOWTO use ns-3 with other libraries

https://www.nsnam.org/wiki/HOWTO_use_ns-3_with_other_libraries

Extending NS3 with your module and extra libraries

http://shieldroute.blogspot.fr/2012/08/extending-ns3-with-your-module-and.html


But they are not very straightforward, or it took me a little while to make it work. So I’ll simply repass the HOWTO with more details here.

  1. The first step is, of course, make your own libraries or the third-party library ready. If you want to build your own libraries, you can check

Static, Shared Dynamic and Loadable Linux Libraries  http://www.yolinux.com/TUTORIALS/LibraryArchives-StaticAndDynamic.html

Assuming now we have a static library named libctest.a and header file ctest.h. 

2. In the wscript file of your module, add the following code:

def configure(conf):
conf.env[‘ENABLE_ctest‘]=conf.check(mandatory=True,
libpath=[‘PATH-TO-YOUR-LIB‘],
includes=[‘PATH-TO-YOUR-HEADER-FILES‘],
lib=’ctest‘,uselib_store=’LIB_CTEST‘)

And

def build(bld):

module.use.append(“LIB_CTEST”)

ATTENTION: the file names and lib names are important!!

If you are using third party libraries, you probably need to define the LD_* variables accordingly.

3. Reconfigure and rebuild ns3 with, if it’s a static library

./waf configure –enable-static

and then

./waf build

4. In the code where you need to make used of the library, include the header files like:

extern “C”{ //we are using c here

#include <ctest.h>

}

Now you can make used of the functions defined in the lib.


Posted in 技术 Tech | 2 Comments